How to Use Midjourney: The Definitive 2026 Guide to AI Artistry and Prompt Engineering
Affiliate disclosure: This article may contain affiliate links. Recommendations are independent and editorially driven.
In 2026, the landscape of digital creativity has been irrevocably reshaped by the advent of artificial intelligence. Among the pantheon of generative AI tools, Midjourney stands as a colossus, empowering artists, designers, marketers, and hobbyists alike to conjure breathtaking visuals from mere textual descriptions. What was once the exclusive domain of highly skilled professionals with years of training is now accessible to anyone with a compelling idea and a grasp of prompt engineering. This comprehensive guide will demystify the process of how to use Midjourney, transforming you from a curious novice into a proficient AI art artisan, capable of crafting stunning, original imagery.
Midjourney is not just a tool; it’s a creative partner, an infinitely patient muse, and a gateway to exploring the boundless frontiers of imagination. Its intuitive yet profound capabilities have revolutionized concept art, digital illustration, graphic design, and even architectural visualization. Understanding how to use Midjourney effectively means more than just typing commands; it involves cultivating a new form of communication with an AI, learning its nuances, its strengths, and its immense potential. Whether you’re aiming to visualize complex scientific concepts, design fantastical creatures, generate marketing collateral, or simply explore your artistic impulses, Midjourney offers an unparalleled platform.
The journey into Midjourney begins with a simple premise: words become worlds. However, to truly harness its power, one must move beyond basic commands and delve into the intricacies of prompt structure, parameter usage, and iterative refinement. This article will guide you through every essential step, from the initial setup and subscription models to advanced prompt engineering techniques, understanding the latest model evolutions, and integrating AI art into professional workflows. We will also address the critical ethical considerations and foster a sense of community engagement, ensuring you not only create remarkable art but do so responsibly and collaboratively. Prepare to unleash your inner visionary as we embark on this exciting exploration of Midjourney.
Getting Started with Midjourney: Your First Steps into AI Art
Embarking on your Midjourney adventure is a streamlined process, designed to quickly get you from curiosity to creation. Unlike some complex software suites, Midjourney primarily operates within the familiar environment of Discord, a popular communication platform. This section will walk you through the initial setup, understanding subscription models, and executing your very first command, setting the foundation for your AI artistry.
Setting Up Your Discord Environment
Midjourney’s primary interface is a bot within Discord. To begin, you’ll need an active Discord account. If you don’t have one, creating one is free and straightforward. Once your Discord account is ready, the next step is to join the official Midjourney Discord server. You can typically find an invitation link on the official Midjourney website (midjourney.com). Upon joining, you’ll see various channels, each serving a distinct purpose:
#newbieschannels: These are your starting points. In these channels, you can safely experiment with commands and generate images without cluttering the main community feeds. They are invaluable for learning how to use Midjourney without intimidation.#general-image-genschannels: As you become more comfortable, you might migrate to these channels, where more experienced users generate their art. Observing others’ prompts and results is an excellent learning tool.#rulesand#announcements: Always review these channels to stay informed about community guidelines, updates, and new features. Understanding the rules ensures a positive experience for everyone.- Direct Messaging (DM) with the Midjourney Bot: For a more private creation space, you can initiate a direct message conversation with the Midjourney bot. This allows for focused work without the constant stream of other users’ generations. This is a preferred method for many advanced users and is highly recommended once you grasp the basics.
Before you can generate anything, you’ll need to accept the Midjourney Terms of Service, typically prompted when you issue your first command. Ensure you read and understand these terms, as they govern your usage and ownership of the generated art.
Understanding Midjourney’s Subscription Tiers
While Midjourney previously offered a free trial, by 2026, consistent, high-quality image generation typically requires a subscription. Midjourney offers various tiers, each providing a different amount of “GPU time” – the computational power required to generate images. Understanding these tiers is crucial for managing your usage and costs:
- Basic Plan: Ideal for casual users or those just starting out. It offers a limited amount of fast GPU time per month. When fast time runs out, generations switch to “Relax Mode,” which is slower but unlimited.
- Standard Plan: The most popular choice for many, providing a generous amount of fast GPU time and unlimited Relax Mode generations. This plan strikes a good balance for consistent creative work.
- Pro Plan: Designed for power users, professionals, and those with high volume needs. It offers significantly more fast GPU time, unlimited Relax Mode, and features like “Stealth Mode,” which keeps your creations private (by default, all Midjourney generations are public on the website).
- Mega Plan: For studios, large enterprises, or individuals with extremely demanding workflows, offering the highest allocations of fast GPU time and all Pro Plan features.
All plans typically include access to the latest Midjourney model versions, commercial usage rights (under specific conditions, always check the latest terms), and access to the Midjourney member gallery. You can manage your subscription and monitor your GPU time usage via your Midjourney account page on their website. It’s important to select a plan that aligns with your creative output needs to ensure a smooth and uninterrupted experience as you learn how to use Midjourney.
Issuing Your First /imagine Command
With your Discord setup and subscription in place, you’re ready for the exhilarating moment of creating your first AI image. The core command in Midjourney is /imagine. This is the magical gateway through which your textual descriptions transform into visual realities.
- Navigate to a Generation Channel: Go to a
#newbieschannel or DM the Midjourney bot. - Type the Command: In the message bar, type
/imagine. As you type, Discord’s auto-completion feature will likely pop up, showing/imagine prompt:. Click or tab to select it. - Enter Your Prompt: After
prompt:, type your descriptive text. Start simple. For example:a vibrant sunset over a futuristic city, digital painting. - Press Enter: The Midjourney bot will process your request. It typically takes less than a minute for the bot to generate an initial grid of four unique images based on your prompt.
Congratulations! You’ve just generated your first set of AI images. Below the image grid, you’ll see a series of buttons:
- U1, U2, U3, U4: These “Upscale” buttons are used to generate a larger, more detailed version of your chosen image (1-4, starting from top-left).
- V1, V2, V3, V4: These “Variation” buttons create four new images, similar in style and composition to your chosen image (1-4). This is excellent for exploring different interpretations of your prompt.
 (Refresh button:) This circular arrow button regenerates the entire grid, giving you four completely new interpretations of your original prompt.
Experiment with these buttons. Upscale an image you like, or generate variations to see where the AI takes your idea. This initial interaction is fundamental to understanding how to use Midjourney’s basic functionalities and begins your journey into iterative AI art creation.
Mastering the Art of Prompt Engineering for Midjourney
The true power of Midjourney lies in your ability to communicate effectively with the AI. This communication happens through “prompts” – the textual descriptions you provide. Prompt engineering is not merely typing words; it’s a skill, an art form, and a critical component of mastering how to use Midjourney. A well-crafted prompt can elevate a mediocre idea into a stunning visual masterpiece.
[INLINE IMAGE 1: place after second H2 | alt=”how to use midjourney concept illustration”]
Deconstructing the Ideal Prompt Structure
While Midjourney is incredibly flexible, there’s a general structure that yields the best results. Think of your prompt as a layered instruction set, guiding the AI towards your vision.
- Subject: Clearly define what you want to see. Be specific. Instead of “dog,” try “a golden retriever puppy playing in a field.”
- Details/Description: Add descriptive adjectives and adverbs. What is the subject doing? What are its characteristics? “A golden retriever puppy with mischievous eyes, leaping through tall grass, bathed in warm afternoon sunlight.”
- Environment/Setting: Where is this happening? Describe the background, foreground, and atmosphere. “A golden retriever puppy with mischievous eyes, leaping through tall grass, bathed in warm afternoon sunlight, against a backdrop of rolling hills and distant storm clouds.”
- Artistic Style/Medium: This is crucial for guiding the aesthetic. Do you want a “digital painting,” “photorealistic image,” “watercolor,” “concept art,” “oil on canvas,” “anime style,” “pixel art,” etc.?
- Artist Influence (Optional but powerful): Reference specific artists or art movements. “By Vincent van Gogh,” “in the style of Hayao Miyazaki,” “Surrealist painting.”
- Technical Aspects/Composition (Optional): Describe camera angles, lighting, color palette, or mood. “Wide-angle shot,” “cinematic lighting,” “pastel colors,” “dramatic atmosphere.”
- Parameters: These are special instructions appended to the end of your prompt, controlling various aspects of the generation. (Discussed in detail next).
A comprehensive prompt might look like: a majestic astronaut exploring an alien bioluminescent forest, intricate details, highly realistic, cinematic lighting, 8k, volumetric rays, inspired by Avatar movie, octane render --ar 16:9 --v 6.1. The more specific and evocative your language, the better Midjourney can interpret your intent. Avoid vague terms and actively use synonyms to explore variations.
Key Parameters and Their Impact
Parameters are powerful modifiers that dramatically influence the output of your Midjourney generations. They are added at the very end of your prompt, usually prefixed with a double-hyphen (--). Understanding these is essential for precision in how to use Midjourney.
--aspector--ar: Controls the aspect ratio of the image.--ar 16:9(widescreen),--ar 9:16(portrait),--ar 1:1(square, default).- Crucial for framing your image for specific uses (e.g., social media, desktop wallpapers).
--v(Model Version): Specifies which Midjourney model to use.--v 6.1(or--v 7,--v 8as new versions are released in 2026). Each version has distinct aesthetic qualities and understanding of prompts. Newer models generally offer improved coherence, detail, and prompt adherence.
--styleor--s: Controls the stylistic strength.--s 0(raw, less artistic interpretation),--s 100(strong artistic flair, more abstract/stylized), up to--s 1000for certain models. Higher values create more “Midjourney-esque” art, while lower values stick closer to your literal prompt.
--stylize: (Often seen as--s, but historically distinct) Controls the degree of Midjourney’s “artistic intervention.” Similar to--style, but the exact range and impact can vary between models.--chaosor--c: Influences the variety of the initial grid.--c 0(minimal chaos, similar images),--c 100(maximal chaos, very diverse images). Useful for exploring broad interpretations of a prompt.
--weirdor--w: Introduces unusual, quirky, or unexpected elements into the generation.--w 0(normal),--w 1000(very weird). Excellent for surreal or experimental art.
--seed: Sets a specific seed number for a generation.- If you like a particular generation and want to create variations that are very similar in composition, find its seed number (using the envelope reaction on a finished generation) and include it in subsequent prompts:
--seed 12345. This provides a baseline of randomness for consistent results.
- If you like a particular generation and want to create variations that are very similar in composition, find its seed number (using the envelope reaction on a finished generation) and include it in subsequent prompts:
--no: A negative prompting parameter, telling Midjourney what to avoid.--no treeswill attempt to remove trees from the image. Very effective for precise control.
--tile: Generates an image that can be seamlessly tiled, perfect for patterns and textures.--stop: Tells Midjourney to stop a generation early, resulting in softer, less detailed images.--style raw: In newer models like v6, this parameter reduces Midjourney’s default artistic enhancement, making it more literal and responsive to intricate prompt details, ideal for photorealistic or specific design needs.
Experimenting with these parameters is key to understanding how they interact and shape your artistic output. A good strategy is to change one parameter at a time to observe its specific effect.
Advanced Prompting Techniques (Multi-Prompts, Weights, Negative Prompts)
Beyond basic parameters, Midjourney offers sophisticated techniques for finer control over your generations, pushing the boundaries of how to use Midjourney effectively.
- Multi-Prompts (
::): This technique allows you to specify distinct concepts within a single prompt and assign relative importance (weights) to them.- Example:
dog::2 cat::1 --ar 16:9. This tells Midjourney to emphasize “dog” twice as much as “cat.” The parts of the prompt are separated by::. - This is invaluable for balancing conflicting ideas or ensuring certain elements receive more attention than others.
- You can also use it to exclude concepts by giving them a negative weight:
dog::2 cat::-0.5.
- Example:
- Image Prompts: Instead of just text, you can start your prompt with one or more image URLs. Midjourney will use these images as inspiration for style, composition, or subject matter.
- Example:
[image_url] a futuristic cityscape. - This is powerful for maintaining visual consistency across a series or for transforming existing imagery into new styles.
- You can even combine multiple image URLs and adjust their weights using
::.
- Example:
- Permutation Prompts (
{}): This technique allows you to generate multiple variations of a prompt by swapping out different words or phrases.- Example:
a {red, blue, green} carwill generate three separate jobs: “a red car,” “a blue car,” and “a green car.” - This is incredibly efficient for exploring variations of a core idea without manually typing each prompt. You can nest permutations for even more complex explorations.
- Example:
- Pan and Zoom: After upscaling an image, you can use the “Pan” arrows (left, right, up, down) or “Zoom Out” buttons to expand the canvas in a chosen direction, allowing Midjourney to fill in the new areas seamlessly. This is fantastic for extending scenes or changing composition without restarting.
Mastering these advanced techniques is what separates casual users from true Midjourney artists. They provide the granularity and flexibility needed to coax out precise visions from the AI, making your journey with Midjourney truly exceptional.
Explore more advanced AI image generation techniques and tools.
Navigating the Midjourney Interface and Commands
While the /imagine command is the cornerstone of Midjourney, the bot offers a suite of other commands and interface elements that streamline your workflow and enhance your creative control. Learning these additional functionalities is crucial for an efficient and productive experience with Midjourney.
Essential Midjourney Commands Beyond /imagine
Beyond generating images, Midjourney provides administrative and utility commands to manage your account, preferences, and generated art:
/settings: This command opens a customizable menu where you can set your default preferences. You can choose your preferred Midjourney model version (e.g., V6.1, V7), switch between Fast and Relax mode, toggle “Remix mode,” and set your default stylize and public mode preferences. Regularly checking and adjusting your settings can significantly improve your workflow and ensure your generations align with your current project needs./info: Provides a snapshot of your account. This includes your subscription type, how much fast GPU time you have remaining, your current mode (Fast/Relax), and how many images you’ve generated in your current billing period. This is vital for monitoring your usage and preventing unexpected fast time depletion./blend: This command allows you to seamlessly combine two to five images without text prompts. Midjourney will analyze the visual characteristics of the input images and generate new images that blend their styles and content. It’s particularly useful for creating hybrid concepts or exploring unexpected visual fusions./shorten: If you have a lengthy prompt,/shortenwill analyze it and suggest which words are most impactful and which could potentially be removed without significantly altering the outcome. This helps in understanding prompt weight and creating more concise, effective prompts./show: If you’ve lost track of a specific job (perhaps in a busy channel), you can retrieve it using its Job ID. The/show <Job ID>command will bring that job back into your current view, allowing you to upscale, vary, or remix it./subscribe: Provides a direct link to your Midjourney subscription page, where you can manage your plan, check billing details, and view your usage statistics.
Incorporating these commands into your routine will make you a much more efficient Midjourney user, allowing you to manage your creations and settings with greater ease.
Upscaling, Varying, and Remixing Your Creations
After generating an initial grid of four images with /imagine, the buttons that appear below the grid are your primary tools for refinement and iteration. Understanding their advanced uses is key to how to use Midjourney for sophisticated outcomes.
- Upscale (U1, U2, U3, U4): Clicking one of these buttons generates a high-resolution version of your selected image. Once upscaled, new buttons appear:
- Vary (Strong/Subtle): These options, especially prominent in newer models, allow you to create variations of the *upscaled* image. “Subtle” maintains high fidelity to the original, while “Strong” introduces more significant changes, perfect for exploring close but distinct alternatives.
- Zoom Out (2x/1.5x): These buttons expand the canvas of your upscaled image, allowing Midjourney to intelligently fill in the newly revealed areas. This is fantastic for changing composition, adding context, or creating panoramic views from a central subject.
- Pan (Left, Right, Up, Down): Similar to Zoom Out, but expands the canvas in a single direction. Useful for extending a scene horizontally or vertically, perhaps to add a specific element or alter the focal point.
- Make Square: If your upscaled image is not square, this option (available on some versions) will expand the canvas to make it a perfect square.
- Custom Zoom: This powerful feature lets you manually adjust the zoom level and aspect ratio. It also allows you to add or modify the prompt for the newly expanded areas, giving you unparalleled creative control over scene extensions.
- Vary (V1, V2, V3, V4): These buttons generate a new grid of four images based on the visual style and content of your selected initial image. They are excellent for exploring different interpretations of your original prompt while retaining a thematic connection.
- Remix Mode: Activated via
/settings, Remix Mode fundamentally changes how the V buttons (and some other variation options) work. When Remix Mode is on, clicking a V button will pop up a prompt box, allowing you to edit the original prompt before generating variations. This means you can change specific elements, add new details, or alter parameters while building upon an existing visual foundation. It’s an indispensable tool for iterative design and prompt refinement.
Exploring the Midjourney Website and Gallery
While Discord is where the magic happens, the official Midjourney website (midjourney.com/app) serves as your personal gallery, archive, and control panel. Understanding its features is crucial for managing your output and learning from others.
- Your Personal Gallery: All your generated images are automatically saved and displayed in your personal gallery on the website. This is an organized, searchable archive of your creative work. You can filter by date, keyword, job ID, or even sort by popularity or quality.
- Community Showcase: The Midjourney website also hosts a vast community gallery, showcasing public creations from other users. This is an incredible resource for inspiration, learning new prompt techniques, and discovering diverse artistic styles. You can often see the exact prompts used by others, providing valuable insights into how to use Midjourney effectively for various outcomes.
- Job History and Management: The website provides a detailed history of all your jobs, including the original prompt, parameters, and all generated image versions. From here, you can download images in full resolution, copy prompts, or even initiate new variations directly from the web interface.
- Subscription and Billing: As mentioned before, your account page on the website is where you manage your subscription, check your remaining GPU time, and update your billing information.
- Image Rating: Occasionally, Midjourney will invite users to rate images based on quality and artistic merit. Participating in this helps train the AI and improve future models, contributing to the collective advancement of the platform.
Regularly visiting your Midjourney website gallery is not just about archiving; it’s about reflection, learning, and finding new inspiration within the vibrant community. It significantly enhances your overall experience of how to use Midjourney.
Learn more about Discord bots and integrating AI tools into your workflows.
From Concept to Masterpiece: Advanced Workflow and Iteration
Creating a truly refined and impactful image with Midjourney rarely happens on the first try. It’s an iterative process, a dance between your vision and the AI’s interpretation. This section delves into advanced workflows, helping you move beyond basic generation to consistently achieve master-level results.
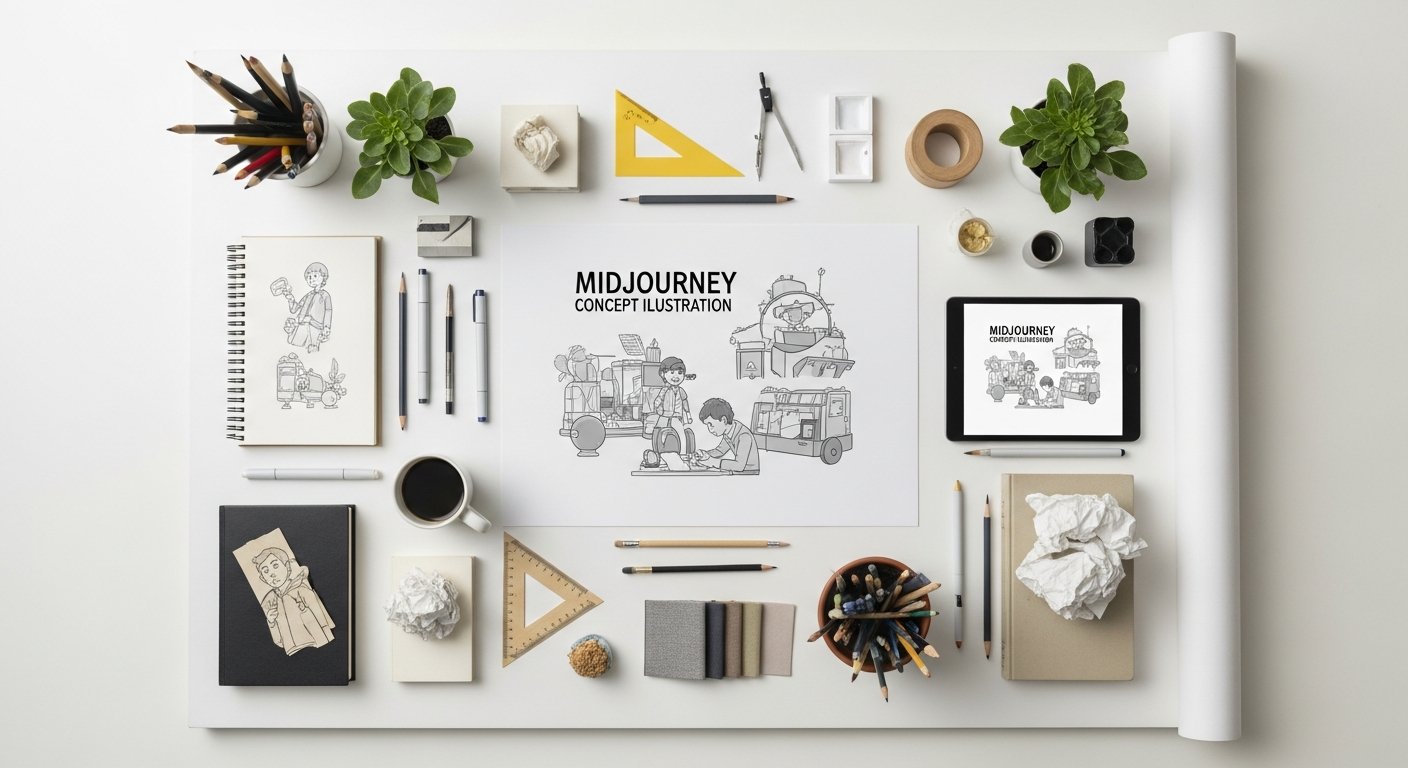
[INLINE IMAGE 2: place after fourth H2 | alt=”how to use midjourney comparison illustration”]
Iterative Prompt Refinement Strategies
The core of advanced Midjourney usage is the art of prompt iteration. Think of it as sculpting: you start with a rough block and slowly carve away, adding details and refining the form until your vision emerges.
- Start Broad, Then Narrow: Begin with a relatively simple prompt to get a general idea. For example, “a futuristic city.” Analyze the initial grid. Does it capture the mood? The architectural style?
- Analyze and Identify Gaps: Once you have an initial generation, critically evaluate what’s missing or what’s not quite right. Is the lighting off? Is a specific element absent? Is the style too generic?
- Add Specificity (One Element at a Time): Instead of overhauling the entire prompt, add one or two descriptive elements. For “futuristic city,” you might add: “a futuristic city at sunset, neon glow.” Generate variations.
- Introduce Style and Medium: Once the basic composition is satisfactory, introduce artistic directions: “a futuristic city at sunset, neon glow, digital painting, synthwave aesthetic.”
- Leverage Parameters for Control: Use
--arfor composition,--nofor exclusion,--sfor style strength, and--chaosfor exploring divergent paths. For example, if the city looks too realistic, add--s 500. If it has unwanted elements, use--no cars. - Use Remix Mode for Surgical Changes: If you have an image you almost love, upscale it, activate Remix Mode (
/settings), and then use the Vary (Strong/Subtle) buttons. When prompted, edit the prompt to precisely adjust an element (e.g., change “sunset” to “sunrise,” or add “flying vehicles”). - Utilize Image Prompts for Consistency: If you create a character or a specific design element you want to reuse, upscale it, save it, and then use its URL as an image prompt at the beginning of new prompts to maintain visual continuity across multiple generations.
- Focus on Keywords: Identify the most impactful keywords in your prompt through trial and error or by using
/shorten. Sometimes, removing extraneous words can lead to a clearer signal for the AI. - Iterate on Variations: Don’t be afraid to take a variation (V1, V2, etc.) and run a new series of refinements on it. Each iteration is an opportunity to get closer to your final vision.
This systematic approach allows you to guide Midjourney with increasing precision, transforming a vague concept into a finely tuned masterpiece.
Using Image Prompts and Permutation Prompts
These advanced tools are not just features; they are foundational to creating complex projects and exploring comprehensive artistic series within Midjourney.
- Advanced Image Prompts:
- Style Transfer: Upload an image of a painting or a photograph with a specific style. Then, combine it with a text prompt describing a different subject. Midjourney will attempt to apply the style of the image to your text prompt. Example:
[URL_to_VanGogh_StarryNight] a modern cityscape. - Subject Consistency: To maintain a consistent character or object across multiple scenes, use an image of that character/object as the primary image prompt. You can then vary the background, lighting, and action with your text prompt.
- Image Weights: You can assign weights to image prompts just like text prompts:
[URL1]::2 [URL2]::1 a concept car. This lets you prioritize one image’s influence over another. - Combine with Text Weights: You can also combine image prompts with text prompts, controlling the influence of each:
[URL_of_cityscape]::1.5 a dragon flying over::2 --ar 16:9. This allows for incredibly nuanced control over the final output.
- Style Transfer: Upload an image of a painting or a photograph with a specific style. Then, combine it with a text prompt describing a different subject. Midjourney will attempt to apply the style of the image to your text prompt. Example:
- Power of Permutation Prompts:
- Batch Experimentation: Instead of running individual jobs for “red car,” “blue car,” “green car,” a permutation prompt
a {red, blue, green} cargenerates all three simultaneously. This is a massive time-saver for testing color palettes, materials, poses, or camera angles. - Scene Variations: You can create variations of a scene by permutating elements:
a knight {fighting a dragon, rescuing a princess, exploring a dungeon}. - Nested Permutations: For even greater complexity, you can nest permutations:
a {medieval, futuristic} knight fighting a {fire, ice} dragon. This would generate four distinct jobs: medieval knight fire dragon, medieval knight ice dragon, futuristic knight fire dragon, futuristic knight ice dragon. This opens up a vast combinatorial space for exploration, perfect for generating comprehensive asset libraries or storyboards. - Ethical Considerations: Be mindful when using permutation prompts with potentially sensitive content, as the AI might generate combinations you didn’t explicitly intend, or that could be problematic.
- Batch Experimentation: Instead of running individual jobs for “red car,” “blue car,” “green car,” a permutation prompt
By integrating image and permutation prompts into your workflow, you dramatically increase your output’s consistency, variety, and speed, truly leveraging the full capabilities of how to use Midjourney for complex projects.
Crafting Cohesive Series and Artistic Styles
One of the most impressive feats you can achieve with Midjourney is not just a single striking image, but an entire cohesive series that tells a story, explores a theme, or establishes a unique artistic style. This requires careful planning and consistent prompt engineering.
- Define Your Core Concept and Aesthetic: Before you even type your first prompt, clearly articulate the overarching theme, mood, and visual style you want for your series. Is it dark fantasy? Retro sci-fi? Abstract minimalism?
- Develop a “Master Prompt” Template: Create a foundational prompt that includes your chosen style, lighting, composition, and any desired artistic influences. This template will be the starting point for every image in your series.
- Example Template:
[Subject] in a [Setting], [Mood] lighting, [Color Palette], [Specific Camera Angle], [Artist/Art Style Influence], highly detailed, volumetric light --ar 16:9 --v 6.1 --s 500
- Example Template:
- Utilize Seeds for Consistency: Once you generate an image that perfectly captures the “vibe” or composition you want for a segment of your series, obtain its seed number (react with an envelope emoji). Use this
--seedin subsequent prompts when generating similar images to maintain visual consistency. - Image Prompts for Character/Object Consistency: If your series features recurring characters, objects, or environments, generate highly refined versions of these elements first. Then, use their URLs as image prompts in combination with your master prompt template to ensure their consistent appearance across different scenes.
- Leverage the
/blendCommand: For seamless transitions or combining elements from different initial generations,/blendcan be incredibly useful. Blend a character with a new background, or two different concept pieces to explore hybrid designs for your series. - Iterative Refinement and Remix Mode: As discussed, refine each image individually using variations, upscales, and Remix Mode. Always refer back to your core concept to ensure each piece contributes to the overall coherence of the series.
- Review and Curate on the Midjourney Website: Use your personal gallery on the Midjourney website to review your entire series. Identify strengths, weaknesses, and areas where consistency might have faltered. This holistic view is crucial for identifying how to use Midjourney to tie disparate images into a coherent narrative or collection.
Crafting cohesive series requires discipline and a methodical approach to prompt engineering. By treating Midjourney as a sophisticated tool for artistic development rather than a one-off image generator, you unlock its true potential for profound creative expression.
Midjourney v6, v7, and Beyond: Understanding Model Evolution
Midjourney is in a perpetual state of evolution. The underlying AI models are regularly updated, bringing new capabilities, improved understanding of natural language, and refined aesthetic qualities. Staying abreast of these model changes is paramount to how to use Midjourney at its peak performance in 2026 and beyond.
Key Innovations in Recent Midjourney Models
Each new major model iteration (like the jump from v5 to v6, and anticipated v7 or even v8 in 2026) represents a significant leap forward in AI art generation. While specific details for future models are proprietary, we can infer trends based on past developments:
- Enhanced Prompt Adherence: Newer models are significantly better at understanding and executing complex, multi-clause prompts. They are less prone to “hallucinating” elements not explicitly mentioned and are more accurate in rendering specific details, text (though still a challenge), and object relationships. This means less “prompt fighting” and more direct translation of your ideas.
- Greater Realism and Detail: Photorealistic outputs become increasingly indistinguishable from actual photographs. Fine details in textures, lighting, and reflections are rendered with astonishing accuracy.
- Improved Understanding of Human Anatomy and Hands: Historically a weak point for AI generators, newer Midjourney models show marked improvements in generating anatomically correct hands, faces, and full-body compositions, reducing the need for extensive inpainting or post-processing.
- New Parameters and Control: With each model, Midjourney often introduces new parameters (like
--weird,--stylize raw) or refines existing ones, offering users even finer control over the generation process. - Better Coherence and Consistency: The AI develops a stronger internal understanding of composition, narrative, and style, leading to more aesthetically pleasing and consistent results across varied prompts.
- Direct Text Generation (Emerging): While still an active area of research, future models are expected to significantly improve their ability to generate legible and correctly spelled text within images, a holy grail for many commercial applications.
- 3D Integration (Hypothetical but likely): Given the trajectory of AI, integration with 3D modeling environments, allowing for direct generation of 3D assets or scenes, is a potential future innovation for Midjourney.
These innovations collectively mean that the bar for what’s possible with AI art is continually being raised, and understanding them helps you push your creative boundaries when you learn how to use Midjourney.
Adapting Your Prompts to New Model Capabilities
As models evolve, your prompting strategies must also adapt. What worked perfectly in an older version might be suboptimal or even counterproductive in a newer one.
- Read Release Notes: Always consult Midjourney’s official announcements and release notes for new model versions. They explicitly detail new features, changes in parameter behavior, and recommended prompting practices.
- Prioritize Concise, Natural Language: Older models sometimes required keyword stuffing or very specific syntax. Newer models (like v6 and beyond) are often trained on vast datasets of natural language, making them more responsive to grammatically correct and descriptively rich sentences. Think like a storyteller, not a programmer.
- Utilize New Parameters: Integrate newly introduced parameters immediately. For instance, the
--style rawparameter in v6 was a game-changer for photorealism and control; ignoring it would mean missing out on significant improvements. - Experiment with Weighting: As models get smarter, the nuanced weighting of multi-prompts (
::) becomes even more effective. Experiment with subtle weight adjustments to fine-tune the balance between different elements. - Reduce Redundancy: With improved prompt adherence, you might find you no longer need to repeat descriptive adjectives. The AI is often capable of inferring context from fewer, more precise words.
- Test and Compare: When a new model is released, run a series of identical prompts across the old and new versions (e.g.,
--v 6
How to Use Midjourney: The Definitive 2026 Guide to AI Artistry and Prompt Engineering
Affiliate disclosure: This article may contain affiliate links. Recommendations are independent and editorially driven.
In 2026, the landscape of digital creativity has been irrevocably reshaped by the advent of artificial intelligence. Among the pantheon of generative AI tools, Midjourney stands as a colossus, empowering artists, designers, marketers, and hobbyists alike to conjure breathtaking visuals from mere textual descriptions. What was once the exclusive domain of highly skilled professionals with years of training is now accessible to anyone with a compelling idea and a grasp of prompt engineering. This comprehensive guide will demystify the process of how to use Midjourney, transforming you from a curious novice into a proficient AI art artisan, capable of crafting stunning, original imagery.
Midjourney is not just a tool; it's a creative partner, an infinitely patient muse, and a gateway to exploring the boundless frontiers of imagination. Its intuitive yet profound capabilities have revolutionized concept art, digital illustration, graphic design, and even architectural visualization. Understanding how to use Midjourney effectively means more than just typing commands; it involves cultivating a new form of communication with an AI, learning its nuances, its strengths, and its immense potential. Whether you're aiming to visualize complex scientific concepts, design fantastical creatures, generate marketing collateral, or simply explore your artistic impulses, Midjourney offers an unparalleled platform.
The journey into Midjourney begins with a simple premise: words become worlds. However, to truly harness its power, one must move beyond basic commands and delve into the intricacies of prompt structure, parameter usage, and iterative refinement. This article will guide you through every essential step, from the initial setup and subscription models to advanced prompt engineering techniques, understanding the latest model evolutions, and integrating AI art into professional workflows. We will also address the critical ethical considerations and foster a sense of community engagement, ensuring you not only create remarkable art but do so responsibly and collaboratively. Prepare to unleash your inner visionary as we embark on this exciting exploration of Midjourney.
Getting Started with Midjourney: Your First Steps into AI Art
Embarking on your Midjourney adventure is a streamlined process, designed to quickly get you from curiosity to creation. Unlike some complex software suites, Midjourney primarily operates within the familiar environment of Discord, a popular communication platform. This section will walk you through the initial setup, understanding subscription models, and executing your very first command, setting the foundation for your AI artistry.
Setting Up Your Discord Environment
Midjourney's primary interface is a bot within Discord. To begin, you'll need an active Discord account. If you don't have one, creating one is free and straightforward. Once your Discord account is ready, the next step is to join the official Midjourney Discord server. You can typically find an invitation link on the official Midjourney website (
midjourney.com). Upon joining, you'll see various channels, each serving a distinct purpose:#newbieschannels: These are your starting points. In these channels, you can safely experiment with commands and generate images without cluttering the main community feeds. They are invaluable for learning how to use Midjourney without intimidation.#general-image-genschannels: As you become more comfortable, you might migrate to these channels, where more experienced users generate their art. Observing others' prompts and results is an excellent learning tool.#rulesand#announcements: Always review these channels to stay informed about community guidelines, updates, and new features. Understanding the rules ensures a positive experience for everyone.- Direct Messaging (DM) with the Midjourney Bot: For a more private creation space, you can initiate a direct message conversation with the Midjourney bot. This allows for focused work without the constant stream of other users' generations. This is a preferred method for many advanced users and is highly recommended once you grasp the basics.
Before you can generate anything, you'll need to accept the Midjourney Terms of Service, typically prompted when you issue your first command. Ensure you read and understand these terms, as they govern your usage and ownership of the generated art.
Understanding Midjourney's Subscription Tiers
While Midjourney previously offered a free trial, by 2026, consistent, high-quality image generation typically requires a subscription. Midjourney offers various tiers, each providing a different amount of "GPU time" – the computational power required to generate images. Understanding these tiers is crucial for managing your usage and costs:
- Basic Plan: Ideal for casual users or those just starting out. It offers a limited amount of fast GPU time per month. When fast time runs out, generations switch to "Relax Mode," which is slower but unlimited.
- Standard Plan: The most popular choice for many, providing a generous amount of fast GPU time and unlimited Relax Mode generations. This plan strikes a good balance for consistent creative work.
- Pro Plan: Designed for power users, professionals, and those with high volume needs. It offers significantly more fast GPU time, unlimited Relax Mode, and features like "Stealth Mode," which keeps your creations private (by default, all Midjourney generations are public on the website).
- Mega Plan: For studios, large enterprises, or individuals with extremely demanding workflows, offering the highest allocations of fast GPU time and all Pro Plan features.
All plans typically include access to the latest Midjourney model versions, commercial usage rights (under specific conditions, always check the latest terms), and access to the Midjourney member gallery. You can manage your subscription and monitor your GPU time usage via your Midjourney account page on their website. It’s important to select a plan that aligns with your creative output needs to ensure a smooth and uninterrupted experience as you learn how to use Midjourney.
Issuing Your First /imagine Command
With your Discord setup and subscription in place, you’re ready for the exhilarating moment of creating your first AI image. The core command in Midjourney is
/imagine. This is the magical gateway through which your textual descriptions transform into visual realities.- Navigate to a Generation Channel: Go to a
#newbieschannel or DM the Midjourney bot. - Type the Command: In the message bar, type
/imagine. As you type, Discord's auto-completion feature will likely pop up, showing/imagine prompt:. Click or tab to select it. - Enter Your Prompt: After
prompt:, type your descriptive text. Start simple. For example:a vibrant sunset over a futuristic city, digital painting. - Press Enter: The Midjourney bot will process your request. It typically takes less than a minute for the bot to generate an initial grid of four unique images based on your prompt.
Congratulations! You’ve just generated your first set of AI images. Below the image grid, you'll see a series of buttons:
- U1, U2, U3, U4: These "Upscale" buttons are used to generate a larger, more detailed version of your chosen image (1-4, starting from top-left).
- V1, V2, V3, V4: These "Variation" buttons create four new images, similar in style and composition to your chosen image (1-4). This is excellent for exploring different interpretations of your prompt.
- (Refresh button:) This circular arrow button regenerates the entire grid, giving you four completely new interpretations of your original prompt.
Experiment with these buttons. Upscale an image you like, or generate variations to see where the AI takes your idea. This initial interaction is fundamental to understanding how to use Midjourney's basic functionalities and begins your journey into iterative AI art creation.
Mastering the Art of Prompt Engineering for Midjourney
The true power of Midjourney lies in your ability to communicate effectively with the AI. This communication happens through "prompts" – the textual descriptions you provide. Prompt engineering is not merely typing words; it's a skill, an art form, and a critical component of mastering how to use Midjourney. A well-crafted prompt can elevate a mediocre idea into a stunning visual masterpiece.
[INLINE IMAGE 1: place after second H2 | alt="how to use midjourney concept illustration"]
Deconstructing the Ideal Prompt Structure
While Midjourney is incredibly flexible, there's a general structure that yields the best results. Think of your prompt as a layered instruction set, guiding the AI towards your vision.
- Subject: Clearly define what you want to see. Be specific. Instead of "dog," try "a golden retriever puppy playing in a field."
- Details/Description: Add descriptive adjectives and adverbs. What is the subject doing? What are its characteristics? "A golden retriever puppy with mischievous eyes, leaping through tall grass, bathed in warm afternoon sunlight."
- Environment/Setting: Where is this happening? Describe the background, foreground, and atmosphere. "A golden retriever puppy with mischievous eyes, leaping through tall grass, bathed in warm afternoon sunlight, against a backdrop of rolling hills and distant storm clouds."
- Artistic Style/Medium: This is crucial for guiding the aesthetic. Do you want a "digital painting," "photorealistic image," "watercolor," "concept art," "oil on canvas," "anime style," "pixel art," etc.?
- Artist Influence (Optional but powerful): Reference specific artists or art movements. "By Vincent van Gogh," "in the style of Hayao Miyazaki," "Surrealist painting."
- Technical Aspects/Composition (Optional): Describe camera angles, lighting, color palette, or mood. "Wide-angle shot," "cinematic lighting," "pastel colors," "dramatic atmosphere."
- Parameters: These are special instructions appended to the end of your prompt, controlling various aspects of the generation. (Discussed in detail next).
A comprehensive prompt might look like:
a majestic astronaut exploring an alien bioluminescent forest, intricate details, highly realistic, cinematic lighting, 8k, volumetric rays, inspired by Avatar movie, octane render --ar 16:9 --v 6.1. The more specific and evocative your language, the better Midjourney can interpret your intent. Avoid vague terms and actively use synonyms to explore variations.Key Parameters and Their Impact
Parameters are powerful modifiers that dramatically influence the output of your Midjourney generations. They are added at the very end of your prompt, usually prefixed with a double-hyphen (
--). Understanding these is essential for precision in how to use Midjourney.--aspector--ar: Controls the aspect ratio of the image.--ar 16:9(widescreen),--ar 9:16(portrait),--ar 1:1(square, default).- Crucial for framing your image for specific uses (e.g., social media, desktop wallpapers).
--v(Model Version): Specifies which Midjourney model to use.--v 6.1(or--v 7,--v 8as new versions are released in 2026). Each version has distinct aesthetic qualities and understanding of prompts. Newer models generally offer improved coherence, detail, and prompt adherence.
--styleor--s: Controls the stylistic strength.--s 0(raw, less artistic interpretation),--s 100(strong artistic flair, more abstract/stylized), up to--s 1000for certain models. Higher values create more "Midjourney-esque" art, while lower values stick closer to your literal prompt.
--stylize: (Often seen as--s, but historically distinct) Controls the degree of Midjourney's "artistic intervention." Similar to--style, but the exact range and impact can vary between models.--chaosor--c: Influences the variety of the initial grid.--c 0(minimal chaos, similar images),--c 100(maximal chaos, very diverse images). Useful for exploring broad interpretations of a prompt.
--weirdor--w: Introduces unusual, quirky, or unexpected elements into the generation.--w 0(normal),--w 1000(very weird). Excellent for surreal or experimental art.
--seed: Sets a specific seed number for a generation.- If you like a particular generation and want to create variations that are very similar in composition, find its seed number (using the envelope reaction on a finished generation) and include it in subsequent prompts:
--seed 12345. This provides a baseline of randomness for consistent results.
- If you like a particular generation and want to create variations that are very similar in composition, find its seed number (using the envelope reaction on a finished generation) and include it in subsequent prompts:
--no: A negative prompting parameter, telling Midjourney what to avoid.--no treeswill attempt to remove trees from the image. Very effective for precise control.
--tile: Generates an image that can be seamlessly tiled, perfect for patterns and textures.--stop: Tells Midjourney to stop a generation early, resulting in softer, less detailed images.--style raw: In newer models like v6, this parameter reduces Midjourney's default artistic enhancement, making it more literal and responsive to intricate prompt details, ideal for photorealistic or specific design needs.
Experimenting with these parameters is key to understanding how they interact and shape your artistic output. A good strategy is to change one parameter at a time to observe its specific effect.
Advanced Prompting Techniques (Multi-Prompts, Weights, Negative Prompts)
Beyond basic parameters, Midjourney offers sophisticated techniques for finer control over your generations, pushing the boundaries of how to use Midjourney effectively.
- Multi-Prompts (
::): This technique allows you to specify distinct concepts within a single prompt and assign relative importance (weights) to them.- Example:
dog::2 cat::1 --ar 16:9. This tells Midjourney to emphasize "dog" twice as much as "cat." The parts of the prompt are separated by::. - This is invaluable for balancing conflicting ideas or ensuring certain elements receive more attention than others.
- You can also use it to exclude concepts by giving them a negative weight:
dog::2 cat::-0.5.
- Example:
- Image Prompts: Instead of just text, you can start your prompt with one or more image URLs. Midjourney will use these images as inspiration for style, composition, or subject matter.
- Example:
[image_url] a futuristic cityscape. - This is powerful for maintaining visual consistency across a series or for transforming existing imagery into new styles.
- You can even combine multiple image URLs and adjust their weights using
::.
- Example:
- Permutation Prompts (
{}): This technique allows you to generate multiple variations of a prompt by swapping out different words or phrases.- Example:
a {red, blue, green} carwill generate three separate jobs: "a red car," "a blue car," and "a green car." - This is incredibly efficient for exploring variations of a core idea without manually typing each prompt. You can nest permutations for even more complex explorations.
- Example:
- Pan and Zoom: After upscaling an image, you can use the "Pan" arrows (left, right, up, down) or "Zoom Out" buttons to expand the canvas in a chosen direction, allowing Midjourney to fill in the new areas seamlessly. This is fantastic for extending scenes or changing composition without restarting.
Mastering these advanced techniques is what separates casual users from true Midjourney artists. They provide the granularity and flexibility needed to coax out precise visions from the AI, making your journey with Midjourney truly exceptional.
Explore more advanced AI image generation techniques and tools.
Navigating the Midjourney Interface and Commands
While the
/imaginecommand is the cornerstone of Midjourney, the bot offers a suite of other commands and interface elements that streamline your workflow and enhance your creative control. Learning these additional functionalities is crucial for an efficient and productive experience with Midjourney.Essential Midjourney Commands Beyond /imagine
Beyond generating images, Midjourney provides administrative and utility commands to manage your account, preferences, and generated art:
/settings: This command opens a customizable menu where you can set your default preferences. You can choose your preferred Midjourney model version (e.g., V6.1, V7), switch between Fast and Relax mode, toggle "Remix mode," and set your default stylize and public mode preferences. Regularly checking and adjusting your settings can significantly improve your workflow and ensure your generations align with your current project needs./info: Provides a snapshot of your account. This includes your subscription type, how much fast GPU time you have remaining, your current mode (Fast/Relax), and how many images you've generated in your current billing period. This is vital for monitoring your usage and preventing unexpected fast time depletion./blend: This command allows you to seamlessly combine two to five images without text prompts. Midjourney will analyze the visual characteristics of the input images and generate new images that blend their styles and content. It's particularly useful for creating hybrid concepts or exploring unexpected visual fusions./shorten: If you have a lengthy prompt,/shortenwill analyze it and suggest which words are most impactful and which could potentially be removed without significantly altering the outcome. This helps in understanding prompt weight and creating more concise, effective prompts./show: If you've lost track of a specific job (perhaps in a busy channel), you can retrieve it using its Job ID. The/show <Job ID>command will bring that job back into your current view, allowing you to upscale, vary, or remix it./subscribe: Provides a direct link to your Midjourney subscription page, where you can manage your plan, check billing details, and view your usage statistics.
Incorporating these commands into your routine will make you a much more efficient Midjourney user, allowing you to manage your creations and settings with greater ease.
Upscaling, Varying, and Remixing Your Creations
After generating an initial grid of four images with
/imagine, the buttons that appear below the grid are your primary tools for refinement and iteration. Understanding their advanced uses is key to how to use Midjourney for sophisticated outcomes.- Upscale (U1, U2, U3, U4): Clicking one of these buttons generates a high-resolution version of your selected image. Once upscaled, new buttons appear:
- Vary (Strong/Subtle): These options, especially prominent in newer models, allow you to create variations of the *upscaled* image. "Subtle" maintains high fidelity to the original, while "Strong" introduces more significant changes, perfect for exploring close but distinct alternatives.
- Zoom Out (2x/1.5x): These buttons expand the canvas of your upscaled image, allowing Midjourney to intelligently fill in the newly revealed areas. This is fantastic for changing composition, adding context, or creating panoramic views from a central subject.
- Pan (Left, Right, Up, Down): Similar to Zoom Out, but expands the canvas in a single direction. Useful for extending a scene horizontally or vertically, perhaps to add a specific element or alter the focal point.
- Make Square: If your upscaled image is not square, this option (available on some versions) will expand the canvas to make it a perfect square.
- Custom Zoom: This powerful feature lets you manually adjust the zoom level and aspect ratio. It also allows you to add or modify the prompt for the newly expanded areas, giving you unparalleled creative control over scene extensions.
- Vary (V1, V2, V3, V4): These buttons generate a new grid of four images based on the visual style and content of your selected initial image. They are excellent for exploring different interpretations of your original prompt while retaining a thematic connection.
- Remix Mode: Activated via
/settings, Remix Mode fundamentally changes how the V buttons (and some other variation options) work. When Remix Mode is on, clicking a V button will pop up a prompt box, allowing you to edit the original prompt before generating variations. This means you can change specific elements, add new details, or alter parameters while building upon an existing visual foundation. It's an indispensable tool for iterative design and prompt refinement.
Exploring the Midjourney Website and Gallery
While Discord is where the magic happens, the official Midjourney website (
midjourney.com/app) serves as your personal gallery, archive, and control panel. Understanding its features is crucial for managing your output and learning from others.- Your Personal Gallery: All your generated images are automatically saved and displayed in your personal gallery on the website. This is an organized, searchable archive of your creative work. You can filter by date, keyword, job ID, or even sort by popularity or quality.
- Community Showcase: The Midjourney website also hosts a vast community gallery, showcasing public creations from other users. This is an incredible resource for inspiration, learning new prompt techniques, and discovering diverse artistic styles. You can often see the exact prompts used by others, providing valuable insights into how to use Midjourney effectively for various outcomes.
- Job History and Management: The website provides a detailed history of all your jobs, including the original prompt, parameters, and all generated image versions. From here, you can download images in full resolution, copy prompts, or even initiate new variations directly from the web interface.
- Subscription and Billing: As mentioned before, your account page on the website is where you manage your subscription, check your remaining GPU time, and update your billing information.
- Image Rating: Occasionally, Midjourney will invite users to rate images based on quality and artistic merit. Participating in this helps train the AI and improve future models, contributing to the collective advancement of the platform.
Regularly visiting your Midjourney website gallery is not just about archiving; it's about reflection, learning, and finding new inspiration within the vibrant community. It significantly enhances your overall experience of how to use Midjourney.
Learn more about Discord bots and integrating AI tools into your workflows.
From Concept to Masterpiece: Advanced Workflow and Iteration
Creating a truly refined and impactful image with Midjourney rarely happens on the first try. It’s an iterative process, a dance between your vision and the AI's interpretation. This section delves into advanced workflows, helping you move beyond basic generation to consistently achieve master-level results.
[INLINE IMAGE 2: place after fourth H2 | alt="how to use midjourney comparison illustration"]
Iterative Prompt Refinement Strategies
The core of advanced Midjourney usage is the art of prompt iteration. Think of it as sculpting: you start with a rough block and slowly carve away, adding details and refining the form until your vision emerges.
- Start Broad, Then Narrow: Begin with a relatively simple prompt to get a general idea. For example, "a futuristic city." Analyze the initial grid. Does it capture the mood? The architectural style?
- Analyze and Identify Gaps: Once you have an initial generation, critically evaluate what's missing or what's not quite right. Is the lighting off? Is a specific element absent? Is the style too generic?
- Add Specificity (One Element at a Time): Instead of overhauling the entire prompt, add one or two descriptive elements. For "futuristic city," you might add: "a futuristic city at sunset, neon glow." Generate variations.
- Introduce Style and Medium: Once the basic composition is satisfactory, introduce artistic directions: "a futuristic city at sunset, neon glow, digital painting, synthwave aesthetic."
- Leverage Parameters for Control: Use
--arfor composition,--nofor exclusion,--sfor style strength, and--chaosfor exploring divergent paths. For example, if the city looks too realistic, add--s 500. If it has unwanted elements, use--no cars. - Use Remix Mode for Surgical Changes: If you have an image you almost love, upscale it, activate Remix Mode (
/settings), and then use the Vary (Strong/Subtle) buttons. When prompted, edit the prompt to precisely adjust an element (e.g., change "sunset" to "sunrise," or add "flying vehicles"). - Utilize Image Prompts for Consistency: If you create a character or a specific design element you want to reuse, upscale it, save it, and then use its URL as an image prompt at the beginning of new prompts to maintain visual continuity across multiple generations.
- Focus on Keywords: Identify the most impactful keywords in your prompt through trial and error or by using
/shorten. Sometimes, removing extraneous words can lead to a clearer signal for the AI. - Iterate on Variations: Don't be afraid to take a variation (V1, V2, etc.) and run a new series of refinements on it. Each iteration is an opportunity to get closer to your final vision.
This systematic approach allows you to guide Midjourney with increasing precision, transforming a vague concept into a finely tuned masterpiece.
Using Image Prompts and Permutation Prompts
These advanced tools are not just features; they are foundational to creating complex projects and exploring comprehensive artistic series within Midjourney.
- Advanced Image Prompts:
- Style Transfer: Upload an image of a painting or a photograph with a specific style. Then, combine it with a text prompt describing a different subject. Midjourney will attempt to apply the style of the image to your text prompt. Example:
[URL_to_VanGogh_StarryNight] a modern cityscape. - Subject Consistency: To maintain a consistent character or object across multiple scenes, use an image of that character/object as the primary image prompt. You can then vary the background, lighting, and action with your text prompt.
- Image Weights: You can assign weights to image prompts just like text prompts:
[URL1]::2 [URL2]::1 a concept car. This lets you prioritize one image's influence over another. - Combine with Text Weights: You can also combine image prompts with text prompts, controlling the influence of each:
[URL_of_cityscape]::1.5 a dragon flying over::2 --ar 16:9. This allows for incredibly nuanced control over the final output.
- Style Transfer: Upload an image of a painting or a photograph with a specific style. Then, combine it with a text prompt describing a different subject. Midjourney will attempt to apply the style of the image to your text prompt. Example:
- Power of Permutation Prompts:
- Batch Experimentation: Instead of running individual jobs for "red car," "blue car," "green car," a permutation prompt
a {red, blue, green} cargenerates all three simultaneously. This is a massive time-saver for testing color palettes, materials, poses, or camera angles. - Scene Variations: You can create variations of a scene by permutating elements:
a knight {fighting a dragon, rescuing a princess, exploring a dungeon}. - Nested Permutations: For even greater complexity, you can nest permutations:
a {medieval, futuristic} knight fighting a {fire, ice} dragon. This would generate four distinct jobs: medieval knight fire dragon, medieval knight ice dragon, futuristic knight fire dragon, futuristic knight ice dragon. This opens up a vast combinatorial space for exploration, perfect for generating comprehensive asset libraries or storyboards. - Ethical Considerations: Be mindful when using permutation prompts with potentially sensitive content, as the AI might generate combinations you didn't explicitly intend, or that could be problematic.
- Batch Experimentation: Instead of running individual jobs for "red car," "blue car," "green car," a permutation prompt
By integrating image and permutation prompts into your workflow, you dramatically increase your output's consistency, variety, and speed, truly leveraging the full capabilities of how to use Midjourney for complex projects.
Crafting Cohesive Series and Artistic Styles
One of the most impressive feats you can achieve with Midjourney is not just a single striking image, but an entire cohesive series that tells a story, explores a theme, or establishes a unique artistic style. This requires careful planning and consistent prompt engineering.
- Define Your Core Concept and Aesthetic: Before you even type your first prompt, clearly articulate the overarching theme, mood, and visual style you want for your series. Is it dark fantasy? Retro sci-fi? Abstract minimalism?
- Develop a "Master Prompt" Template: Create a foundational prompt that includes your chosen style, lighting, composition, and any desired artistic influences. This template will be the starting point for every image in your series.
- Example Template:
[Subject] in a [Setting], [Mood] lighting, [Color Palette], [Specific Camera Angle], [Artist/Art Style Influence], highly detailed, volumetric light --ar 16:9 --v 6.1 --s 500
- Example Template:
- Utilize Seeds for Consistency: Once you generate an image that perfectly captures the "vibe" or composition you want for a segment of your series, obtain its seed number (react with an envelope emoji). Use this
--seedin subsequent prompts when generating similar images to maintain visual consistency. - Image Prompts for Character/Object Consistency: If your series features recurring characters, objects, or environments, generate highly refined versions of these elements first. Then, use their URLs as image prompts in combination with your master prompt template to ensure their consistent appearance across different scenes.
- Leverage the
/blendCommand: For seamless transitions or combining elements from different initial generations,/blendcan be incredibly useful. Blend a character with a new background, or two different concept pieces to explore hybrid designs for your series. - Iterative Refinement and Remix Mode: As discussed, refine each image individually using variations, upscales, and Remix Mode. Always refer back to your core concept to ensure each piece contributes to the overall coherence of the series.
- Review and Curate on the Midjourney Website: Use your personal gallery on the Midjourney website to review your entire series. Identify strengths, weaknesses, and areas where consistency might have faltered. This holistic view is crucial for identifying how to use Midjourney to tie disparate images into a coherent narrative or collection.
Crafting cohesive series requires discipline and a methodical approach to prompt engineering. By treating Midjourney as a sophisticated tool for artistic development rather than a one-off image generator, you unlock its true potential for profound creative expression.
Midjourney v6, v7, and Beyond: Understanding Model Evolution
Midjourney is in a perpetual state of evolution. The underlying AI models are regularly updated, bringing new capabilities, improved understanding of natural language, and refined aesthetic qualities. Staying abreast of these model changes is paramount to how to use Midjourney at its peak performance in 2026 and beyond.
Key Innovations in Recent Midjourney Models
Each new major model iteration (like the jump from v5 to v6, and anticipated v7 or even v8 in 2026) represents a significant leap forward in AI art generation. While specific details for future models are proprietary, we can infer trends based on past developments:
- Enhanced Prompt Adherence: Newer models are significantly better at understanding and executing complex, multi-clause prompts. They are less prone to "hallucinating" elements not explicitly mentioned and are more accurate in rendering specific details, text (though still a challenge), and object relationships. This means less "prompt fighting" and more direct translation of your ideas.
- Greater Realism and Detail: Photorealistic outputs become increasingly indistinguishable from actual photographs. Fine details in textures, lighting, and reflections are rendered with astonishing accuracy.
- Improved Understanding of Human Anatomy and Hands: Historically a weak point for AI generators, newer Midjourney models show marked improvements in generating anatomically correct hands, faces, and full-body compositions, reducing the need for extensive inpainting or post-processing.
- New Parameters and Control: With each model, Midjourney often introduces new parameters (like
--weird,--stylize raw) or refines existing ones, offering users even finer control over the generation process. - Better Coherence and Consistency: The AI develops a stronger internal understanding of composition, narrative, and style, leading to more aesthetically pleasing and consistent results across varied prompts.
- Direct Text Generation (Emerging): While still an active area of research, future models are expected to significantly improve their ability to generate legible and correctly spelled text within images, a holy grail for many commercial applications.
- 3D Integration (Hypothetical but likely): Given the trajectory of AI, integration with 3D modeling environments, allowing for direct generation of 3D assets or scenes, is a potential future innovation for Midjourney.
These innovations collectively mean that the bar for what's possible with AI art is continually being raised, and understanding them helps you push your creative boundaries when you learn how to use Midjourney.
Adapting Your Prompts to New Model Capabilities
As models evolve, your prompting strategies must also adapt. What worked perfectly in an older version might be suboptimal or even counterproductive in a newer one.
- Read Release Notes: Always consult Midjourney's official announcements and release notes for new model versions. They explicitly detail new features, changes in parameter behavior, and recommended prompting practices.
- Prioritize Concise, Natural Language: Older models sometimes required keyword stuffing or very specific syntax. Newer models (like v6 and beyond) are often trained on vast datasets of natural language, making them more responsive to grammatically correct and descriptively rich sentences. Think like a storyteller, not a programmer.
- Utilize New Parameters: Integrate newly introduced parameters immediately. For instance, the
--style rawparameter in v6 was a game-changer for photorealism and control; ignoring it would mean missing out on significant improvements. - Experiment with Weighting: As models get smarter, the nuanced weighting of multi-prompts (
::) becomes even more effective. Experiment with subtle weight adjustments to fine-tune the balance between different elements. - Reduce Redundancy: With improved prompt adherence, you might find you no longer need to repeat descriptive adjectives. The AI is often capable of inferring context from fewer, more precise words.
- Test and Compare: When a new model is released, run a series of identical prompts across the old and new versions (e.g.,
--v 6